Aerial Fiber Optic Cable Overview and Installation Guide
The scene of aerial cables hanging in the pole is ubiquitous in our daily lives. Unlike other common fiber optic cables, this kind of optical cable is designed to adjust to the harsh outdoor environments for aerial installments. This article will give you an overall introduction and installation guide of this aerial cable type.
Introduction and Classification of Aerial Fiber Optic Cables
Aerial fiber optic cable refers to a kind of fiber optic cable that is designed and used for outside plant (OSP) installation between poles by being lashed to a wire rope messenger strand with a small gauge wire. Generally speaking, they are usually made of heavy jackets and strong metal or aramid strength members. Adopting aerial fiber optic cables, the aerial construction will allow the installers to reuse the existing pole infrastructure without digging up other roads to bury cables or ducts, and will also save the capital expenditure for the network providers to some degree.

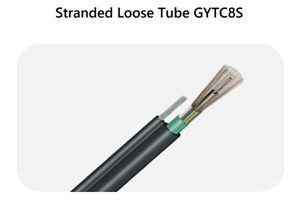
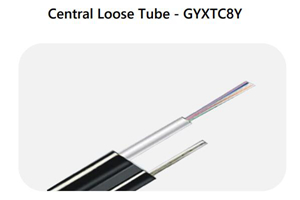
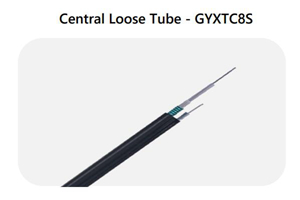
According to the installation methods, aerial fiber optic cables can be generally classified as two types—catenary wire and self-supporting: the former is a kind of regular outdoor loose-tube cables that can be helically lashed to a messenger or another cable (common in CATV); the latter is strong enough to support itself between structures without using conductive metal elements, which can be further divided into All-Dielectric Self-Supporting (ADSS) cable and Figure 8 cable. Figure 8 aerial cables are the most commonly-used aerial fiber optic cables. And it can be divided into three main types: GYTC8S, GYXTC8Y, and GYXTC8S.
| GYTC8S | GYXTC8Y | GYXTC8S | |
|---|---|---|---|
| Features |
Small cable diameter. Low dispersion and attenuation. Excellent mechanical and environmental performances. Steel-wire strength member ensures tensile strength. Corrugated steel tape and the PE outer sheath ensure crush resistance. Water blocking system to improve the waterproof ability. |
Small cable diameter. Low dispersion and attenuation. Excellent mechanical and environmental performances. High strength loose tube that is hydrolysis resistant. Medium Density Polyethylene (PE) Jacket, low friction installation. |
Small cable diameter. Low dispersion and attenuation. Excellent mechanical and environmental performances. Corrugated steel tape and the PE outer sheath ensure crush resistance. Water blocking system to improve the waterproof ability. |
| Figure (Internal Structure) |
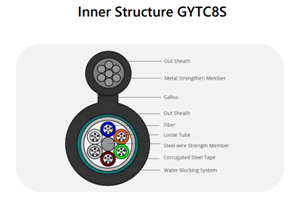
|
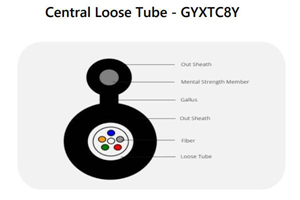
|
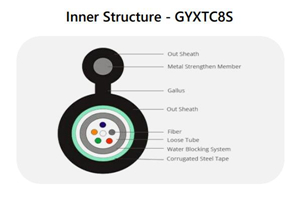
|
| Figure (Optical Cable) |
|
|
|
| Applications |
Outdoor aerial application Long-haul and LAN communication Subscriber network systems Junction communication systems CATV & Computer networks system |
||
Installation Guide to Aerial Fiber Optic Cables
Aerial fiber optic cable installation is complicated and time-consuming on account of considerations on natural destruction and man-made damages before installation. No matter what type of aerial fiber cable is, the cable installation procedure is similar. The following steps will teach you how to install aerial fiber cables.
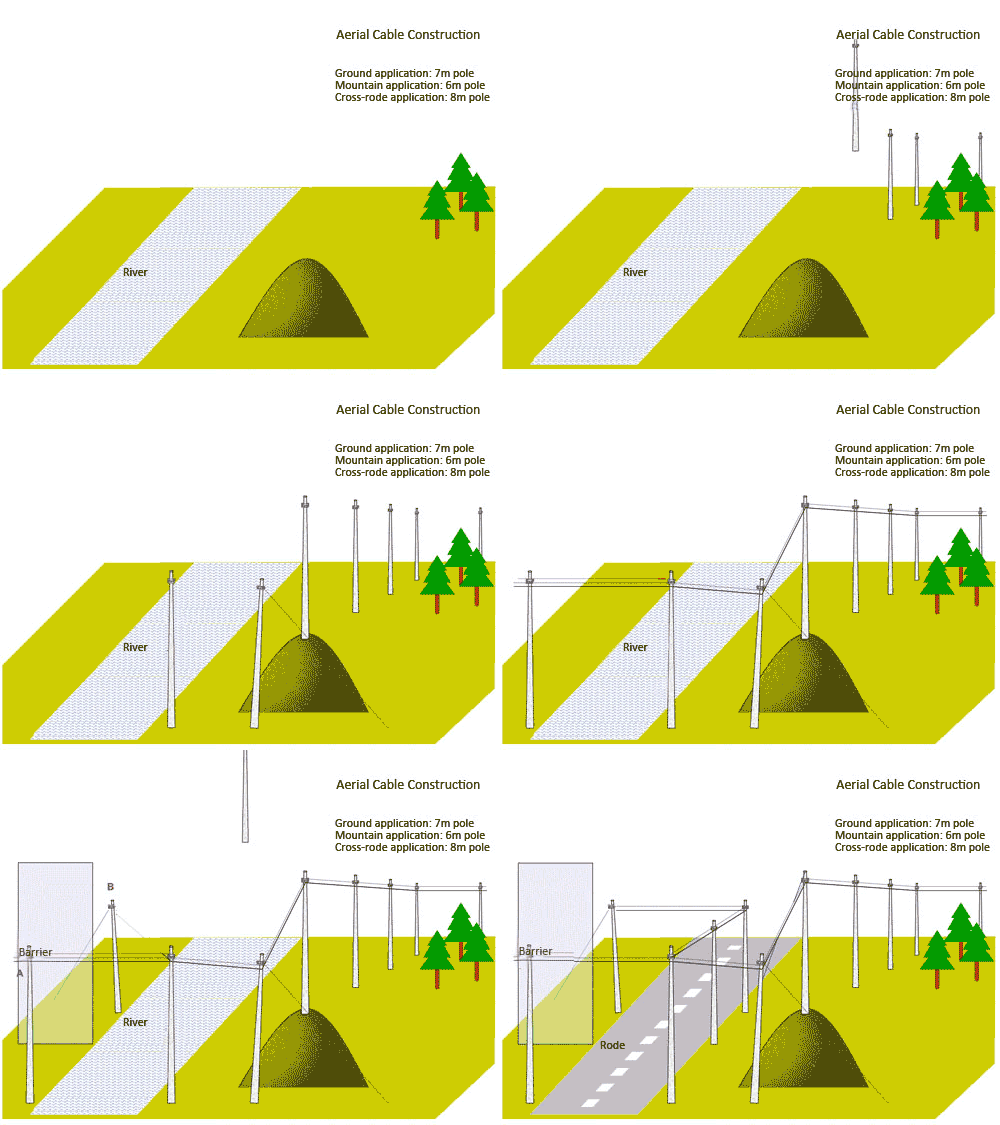
Pre-Construction Preparations
Before starting the installation, the following preparation items must be done to ensure the whole installation procedures go on wheels.
-
A Pre-survey—planning the cable route, which will determine the aerial cable installation method to be used, as well as the equipment and material requirements.
-
Installation Issues—investigating the conditions of the ground along the route, including clearance problems over roadways, driveways, trees or other obstructions, etc.
-
Splice Locations—selecting splice locations allows verification of the transmission design and makes preparation for cable order lengths, making sure that the locations won't lie in sites where access is inconvenient or hazardous.
Aerial Fiber Optic Cable Installation Procedures
Two typical methods for aerial fiber optic cable installation—moving reel method and stationary reel method. Here are the basic steps for these two installation methods.
Deploying Aerial Fiber Optic Cable With a Moving Reel Method
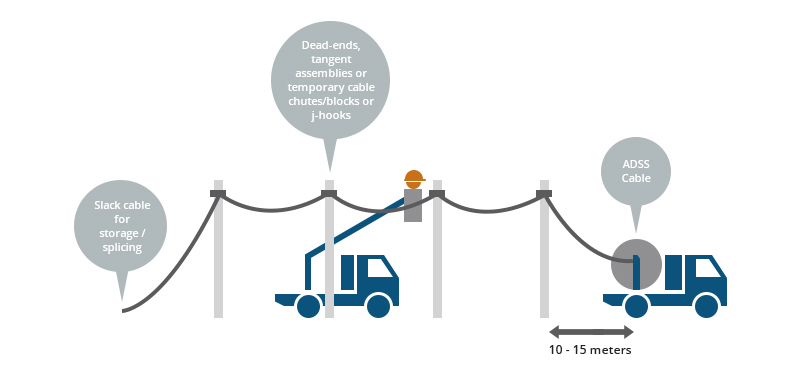
The moving reel method is normally adopted when a cable reel trailer or aerial lift truck can be moved along the pole line and there are no obstructions to prevent raising the cable. It is a one-pass operation without requiring the use of cable blocks or pull lines, saving time for the whole deployment. However, it is not usually used in the entire cable deployment and the stationary reel placing is needed invariably.
The deployment follows this sequence:
Step 1: The cable reel should be mounted on a reel carrier on a cable trailer or aerial line truck. Then the reel carrier is driven along the cable route.
Step 2: As it advances along the route, the cable ought to be paid off the reel with no back tension on the reel, guided to the pole, and supported with appropriate hardware.
Step 3: Check whether the distance between the aerial line truck or cable truck and the position of the first pole is suitable, ensuring that there is sufficient slack cable available for splicing and slack storage.
Step 4: Then the installer should fit the appropriate dead-end support to the cable, raise it to the correct support level, and mount the dead-end to the pole.
Step 5: The placing vehicle must be driven parallel and close to the pole line as possible when maintaining constant speed and tension.
Step 6: Once the cable pay-off is an adequate distance past the next pole in the route, the cable should be raised to the required pole height and placed into a J hook or temporary support.
Step 7: Continue to install span by span until the entire run is completed and the final dead-end pole has been reached.
Step 8: At this point, the cable should be tensioned to the correct sag level using suitable chain hoist equipment at the "free" end of the cable before it is dead-ended to the pole.
Step 9: Finally, the cable can be lifted out of the temporary J hooks or temporary supports and permanently fixed using tangent assemblies.
Deploying Aerial Fiber Optic Cable With Stationary Reel Method
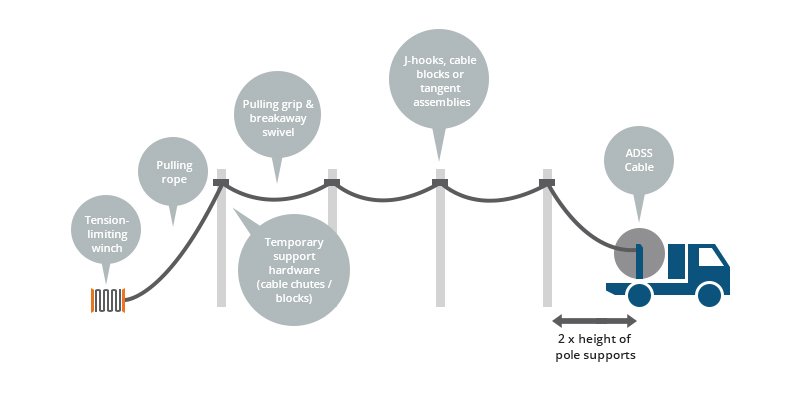
The stationary reel method is generally used when the cable is installed above the existing lateral cable and other obstructions. The types of vehicles and available placing equipment will also depend on whether to use this method or not.
The deployment procedure is as follows:
Step 1: Install a series of temporary cable supports, chutes, or tangent blocks at each pole along the route.
Step 2: Then, a pull line is threaded through the cable supports and attached to the outside of the cable using a breakaway swivel and a cable pulling grip. It is then used to pull the cable through the cable blocks into position.
Step 3: If the cable is pulled with a winch, the pulling rope or winch line must be installed through the cable supports. A non-metallic rope or winch line should then be used to pull the cable.
Step 4: When the installation tension exceeds the maximum rated cable load (MRCL), the pulling winch should be calibrated to stop the operation. A dynamometer with an audible alarm or visual display should be used to monitor installation tension in case this type of winch isn't available.
Step 5: After the cable has been pulled into its final position, with slack for building access or for splicing, the cable should be tensioned until the correct sag level is reached. Then it should be terminated at each dead-end pole along the route.
Post-Construction Inspection
Work doesn't finish completely after aerial fiber optic cable installation. Post-construction inspection is also important for a successful cable deployment. Check the following items to examine whether your installation is successful.
1. Before splicing, inspect the aerial cable plant thoroughly, especially pay attention to the exact location of all splice points.
2. Presence of kinked or damaged cable.
3. Improperly installed or missing drip loops.
4. Improperly installed or missing grounds.
Brief Summary
Compared with buried cable or fiber in-duct solution, aerial fiber optic cable solution is typically faster and less expensive to deploy than digging, particularly for backbone fiber. It provides a cost-effective solution for many users that consider aerial fiber optic deployments. After reading the previous comprehensive installation guide, installing aerial fiber optic cables for outdoor applications won't be a risky job.
You might be interested in
Email Address
-
PoE vs PoE+ vs PoE++ Switch: How to Choose?
May 30, 2024


