
FS Media Converter Installation Guide
Media converters play a crucial role in network infrastructure by enabling the integration of different types of network cables, such as converting fiber optic cables to copper Ethernet. The installation method you choose for media converters can significantly impact the efficiency and reliability of your network. This article explores various installation methods—wall mount, desktop, and rack mount, each offering unique advantages depending on the network environment.
Different Installation Methods
Wall Mount Installation
Wall mounting is a space-saving solution for installing media converters, especially in environments where desk or rack space is limited. This method helps keep the devices out of the way, reducing clutter and potential damage.
Steps for Wall Mount Installation:
-
Choose a Location: Select a location on the wall near your network devices and ensure there is access to a power outlet./p>
-
Mounting Bracket: Use the provided mounting bracket. Attach it to the wall using screws and anchors appropriate for the wall material (e.g., drywall, concrete).
-
Attach the Converter: Securely fasten the media converter to the secure bracket to prevent any movement or disconnection.
-
Connect Cables: Connect the necessary fiber and Ethernet cables to the media converter, ensuring proper cable management to avoid strain on the connectors.

Desktop Installation
Desktop installation is ideal for small setups or temporary installations where flexibility and easy access are needed.
Steps for Desktop Installation:
-
Place the Converter: Position the media converter on a stable, flat surface close to the devices you are connecting.
-
Connect Cables: Attach the fiber and Ethernet cables to the appropriate ports on the media converter, ensuring the cables are not bent or kinked.
-
Power Connection: Connect the power adapter to the media converter and plug it into a power outlet. Ensure the converter is powered on and functioning correctly.

Rack Mount Installation
Rack mounting is commonly used in data centers and larger network environments where multiple media converters need to be organized efficiently.
Steps for Rack Mount Installation:
-
Select a Rack-Mount Chassis: Choose a rack-mount chassis that can accommodate the number of media converters you plan to install.
-
Install Converters in Chassis: Slide the media converters into the slots in the chassis and secure them with screws or clips.
-
Mount Chassis in Rack: Attach the chassis to the rack using rack mount screws. Ensure it is level and securely fastened.
-
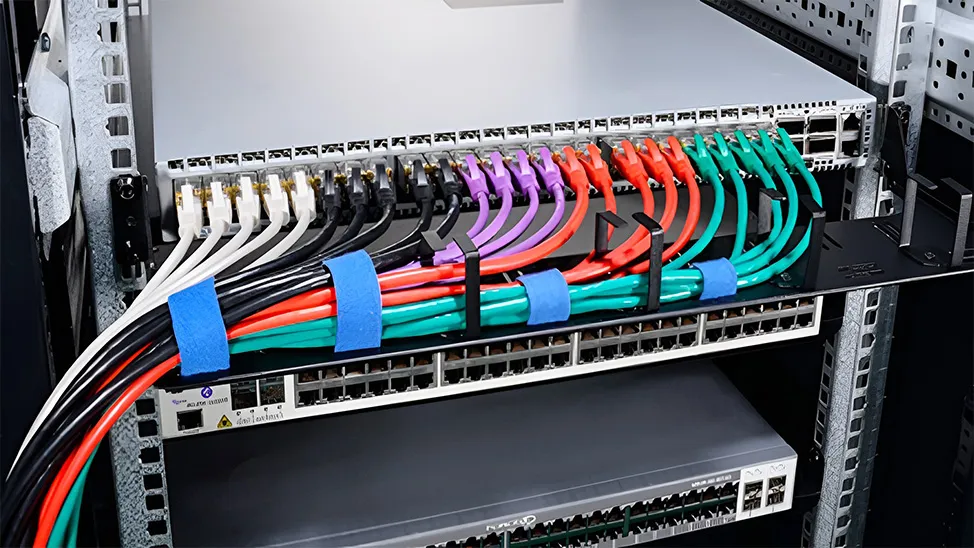
Connect Cables: Connect all necessary fiber and Ethernet cables to each media converter. Use cable management solutions like Velcro ties to organize cables and reduce strain on connectors.
-
Power Supply: If the chassis supports redundant power supplies, connect them to ensure uninterrupted operation. Power on the converters and check for proper functionality.

For this scenario, the FS MFMC-12DP 12 Slots Mini Media Converter Chassis stands out as an excellent solution. As your network grows, you can mount a chassis in your equipment rack and install your media converters in the chassis. The housing of each media converter can be easily removed, allowing the media converter PC board to slide into the chassis. This setup enables the installation of multiple media converters alongside the network devices they support, providing space savings and a neat cabling arrangement.
The default power type for this device is AC, but a DC version can be customized with a lead time of approximately 7 working days. For maximum power availability, an optional redundant power supply is available for installation in the chassis.
Benefits of Different Installation Methods
Choosing the right installation method for your media converters offers several advantages, ensuring optimal performance and efficient network management:
Wall Mount
-
Space-Saving: Wall mounting saves valuable desk or rack space, making it ideal for environments with limited space.
-
Clutter Reduction: Keeps media converters out of the way, minimizing the risk of accidental damage or disconnection.
-
Orderly Arrangement: Maintains a tidy network setup, particularly useful in offices or small server rooms.
Desktop
-
Flexibility: Easily allows relocation and reconfiguration of network setups as needed.
-
Accessibility: Makes it easy to access media converters for maintenance, troubleshooting, or reconfiguration.
-
Ideal for Small Setups: Perfect for small network environments or temporary installations where mobility is a priority.
Rack Mount
-
Scalability: Accommodates multiple media converters in a single chassis, suitable for larger networks.
-
Efficient Management: Simplifies maintenance and management in data centers and extensive network environments.
-
Organized Layout: Facilitates efficient cable management, reducing potential issues from tangled or strained cables.
-
Redundancy: Supports redundant power supplies, ensuring uninterrupted operation and enhancing network reliability.
Conclusion
Choosing the right installation method for your media converters depends on the specific needs of your network environment. Whether you opt for wall mount, desktop, or rack mount installation, ensure that the converters are securely installed and properly connected to maintain network performance and reliability.


Email Address


PoE vs PoE+ vs PoE++ Switch: How to Choose?
May 30, 2024


-